You know when someone asks you to knit something, you say “I can knit that” and then a moment later, you have to explain the difference between can and will? This is NOT that project!

Over the years, I’ve had a couple inquiries about knitted bike cozies. It’s something I’ve always wanted to do. People have asked. I’ve said yes. Somehow though, it’s never happened. Things always fall apart.
That is, until now!
My friend, Wendy, asked about it. She’s a daily bicycle commuter, a lover of DIY makers everywhere and most importantly, a woman with follow through!

She brought her bike over for measurements in short order! I did a couple little swatches and off I went. The knitting is quite basic.


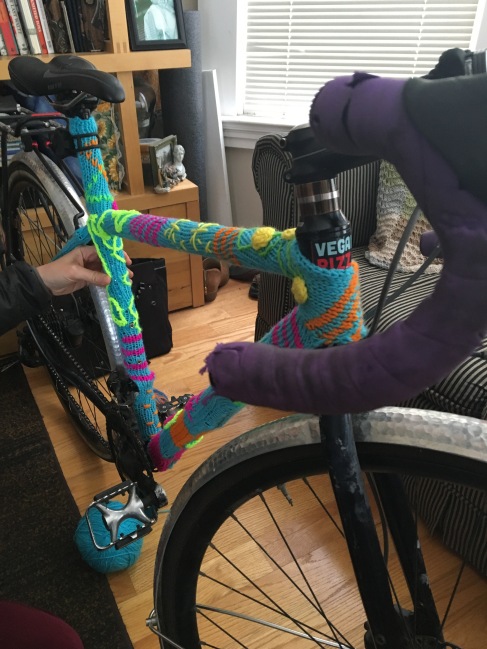
Stockinette stitch, knit in long, flat, rectangular panels. No shaping at all. I played around with a lot of techniques for the embellishments. I started with simple stripes, even did a little stranded work. Mostly though, the details came after…appliques (my favorite these days), surface crochet, duplicate stitch and a slew of embroidery techniques that I know nothing about (unventions, indeed!)


My favorite discovery came while duplicate stitching…instead of covering 1 stitch at a time, I made my duplicate stitches 2 stitches tall. It was liberating! I’m not sure why it’s never occurred to me to duplicate stitch something other than one straight stitch. Once I was changing their size, it seemed pretty obvious that duplicate stitches don’t have to go in a straight line.
BAM! Mind blown.
Curved duplicate stitch…I’m sure someone familiar with embroidery techniques is currently saying ‘why yes, that’s called blah blah blah stitch’. It was news to me though and I had a lot of fun playing around with it. I’ve got lots of ideas for embellishing new hats now!
There was one challenge to this project though. Sewing pieces onto a bicycle is kind of awkward.
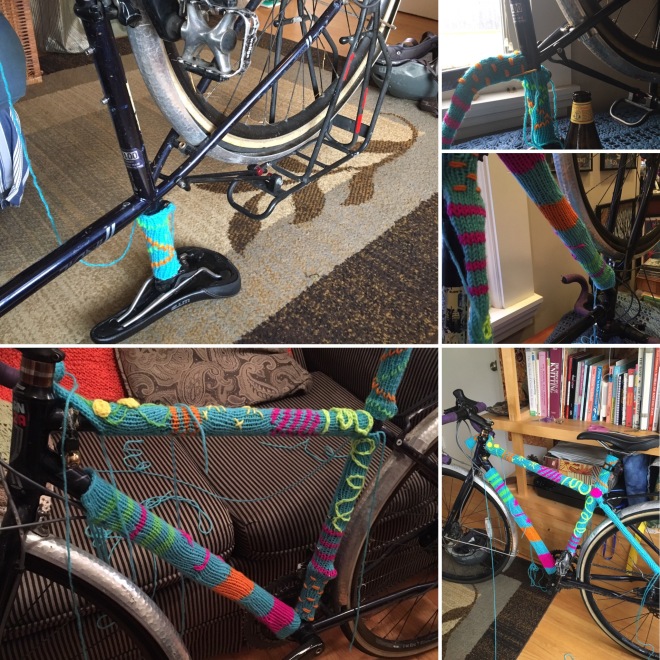
In order to reach all the right places, at the right times, I must’ve put this bike in 37 different positions to figure it all out. Upside down, right side up, left side out, right side out, around the gears, past the fender and out the other side. There’s a lot more small spaces on a bike than I’d actually contemplated before.
Without fail, my hand could not travel the same path the yarn needed. It was an interesting exercise in mindfulness, a challenge to my years of muscle memory. I kept at it though and the pieces all went together better than I even imagined! I’m really happy with the whole thing. Woot!
And the best part, Wendy really loves it too!
Actually, the best part…Wendy loves it AND she rides her bike all over the place! I’ve never seen a yarnbombed bike that was functional. I’ve seen them in shop windows and as art pieces. I’ve certainly never walked down the street and seen a bike like this locked to a pole. That is about to change!
The adventures are just beginning!
The only question left…who’s next?

I love it!! You did a fantastic job:)
LikeLiked by 1 person
You did this SO quickly! Amazing work.
LikeLike
That is so flipping awesome and if I didn’t love the color of my bike, I would say Me, Me, Me!!! LOL
LikeLiked by 1 person
Very nice :) (Not going to do it on my bike though)
LikeLiked by 1 person
So pretty! I love the duplicate stitch!
LikeLiked by 1 person
I realize you live in San Francisco area and this kind of thing is normal there, But seriously you were the only person I know who would do something like this. That was an amazing project
LikeLiked by 1 person
One of things I thought about a lot while I worked on this is that it’s NOT normal. It should be…but it’s not. I think people don’t view it as functional. I need to check in with my friend and see how week 1 with her new bike went :)
LikeLiked by 1 person
Brilliant!
LikeLiked by 1 person